Woodworking Talk banner
21 - 35 of 35 Posts
Nevertheless, what’s the harm in opening someone’s mind to another approach? I could post for an hour how forums have helped me this way.
Exactly!
A forum is an interaction among members with the exchange of information.
When the original question is answered as well as alternative solutions, that's the best of all worlds.
Just like I have learned from members here, I have offered my experiences for others to learn from.
The good DrRobert and myself probably have about 100 years of combined experience to bless others with.
 
In comparison , I must be have 300 years experience..

Experience comes from projects, not chatting..

”I'm through with this debate, have it your way.”——Woodnthings


Yet your on and on and on about it.
 
I think it would be more useful to purchase a router bit set made for a panel door. The glass door profile in post 1 would need to be doweled to hold it together since there is no tongue. What I normally do for a glass door is put the panel door frame together without the panel and after it's dry route the back side of the door out to accept the glass.
 
I don’t know who that was directed at, but answering for myself, I did try to answer his question, then later offered an opinion on what I thought was a more appealing way. There are other ways to do miters than a chop saw. That indicated to me the OP might be limiting what he can do.

Nevertheless, what’s the harm in opening someone’s mind to another approach? I could post for an hour how forums have helped me this way.
There is absolutely nothing wrong with offering alternate approaches when it appears the OP is not aware of them, what you did in this case makes perfect sense. What bothers me is when posters come across as the resident experts offering alternatives more with a sense of one-upmanship than simply offering helpful information.
 
Discussion starter · #25 ·
Now seeing the rest of the frame, it does "make sense"!
It does make for a "butted corner" look, but it's likely very strong.
If you're convinced that joint is what you want? be aware the making that section/profile on the end of a 2" to 3" wide piece will require a very stable support for the workpiece. It will want to tear out the end grain as it completes the cut, so a "backer" is required making a zero clearance support.
Typical 45 degree "miters" do not have that complication and they can be easily splined for strength.
Do you have a decent table saw? That would be my next tool purchase as you get further down the woodworking trail ....

Here's a small router table project that shows the various steps and hold downs I used:
View attachment 475952

Here's a great overall review of routers:
Thanks so much for this! I really appreciate your thoughts and help. I don't have a table saw, but have been eyeing them up. I only have a little tiny space with about a 6ft work bench in the back of my garage. So I have space issues. I watch a ton of video's that you all have shared and it's giving me some great ideas.
 
Discussion starter · #26 ·
Thanks for everyone's input!

My clients think these frames look great :) I'm a portrait painter, and usually paint dog portraits. I have a pretty good local business painting them. My popular size is 11x14 which I mount on masonite. An Amish furniture builder ended up starting making me these frames from oak and walnut for 12.00 a frame unfinished. So I started using them as an inexpensive add on. I charge 40.00 extra for them. They are 100x better than anything store bought and cheaper then using another woodworker making them. And I'm not really a woodworker, but I not afraid to learn :) These frames allows me to keep the cost down for my commissions.

My woodworking tools are old hand me downs and I don't have a table saw, and my miter saw is pretty crappy.

Anyway.. my Amish connection is no longer there so I have been exploring how I can do these without a huge tool investment. I have an old router and benchtop table so I was just asking if something like this was possible and what router bits make those particular cuts.

Woodnthings has been very nice.
 
Discussion starter · #27 ·
Do you plan on doing this often or is this just a short term thing meaning a frame or 3? You could always apply the 1/4 round thumbnail with glue and nails after you made the rectangular frame with a rabbet on the interior.

This is essentially a glass door profile. You can also do it with a door profile which leaves a slot. You assemble the door frame and then rout out the remaining back to reveal the rabbet. I do this all the time and have a router bit modified a bit to accomplish it. It's just a 1/4" bottom bearing flush cut bit and I have to grind the screw flat that holds in the bearing so it can get down far enough to make the cut to remove the remaining stock that forms the slot. Once it's removed you have a rabbet and all you need to do is square out the corners which is easy because the 1/4" flush cut bit only leaves a 1/8" radius round.
Thanks Leo!
Well, for the moment I may have to be making around 5 a month. I'm actually a portrait painter and my popular size is 11x14.. and my clients always do my frame add on. It's only 40.00 extra. The guy who was making my frames only charged me 12.00 so it's a nice markup :)

Ohhh.. I like that idea.. Can I ask, if my stock is 1x2 oak or walnut what kind of router should I have? Right now I have a 1.5hp Ryobi mounted in a benchtop router table.. 1/4 collet. It's a good size as I have very minimal space. But maybe I need something bigger, more powerful?
 
As far as the glass groove is concerned….

We will take this carbide bit and grind down some of the radius at the end so it first in the groove to cut out the excess. You can go in the correct direction, but we usually go backwards and route most of the meat and go back in the correct direction to clean it up.
Image
 
My woodworking tools are old hand me downs and I don't have a table saw, and my miter saw is pretty crappy.
I don't have a table saw, but have been eyeing them up.
Assuming it's a "look" that you're after? Rather than a particular process or method?
The appearance of that joint is much like a half lap, also a very strong joint.
Image


Half laps can be made with a hand saw, a dado bit in a router or on a table saw or with a bandsaw, as I normally do.
Your woodworking projects will be limited by the limited type of tools you have.
Getting more serious about woodworking will mean getting more tools and machines.
The door joint bit set is about your only method at this point.
Unless you consider using the half lap with the router?
The door set bits are expensive at $135, last I saw posted above, so that's a considerable investment.

 
  • Like
Reactions: David H
Discussion starter · #30 ·
Assuming it's a "look" that you're after? Rather than a particular process or method?
The appearance of that joint is much like a half lap, also a very strong joint.
View attachment 476010

Half laps can be made with a hand saw, a dado bit in a router or on a table saw or with a bandsaw, as I normally do.
Your woodworking projects will be limited by the limited type of tools you have.
Getting more serious about woodworking will mean getting more tools and machines.
The door joint bit set is about your only method at this point.
Unless you consider using the half lap with the router?
The door set bits are expensive at $135, last I saw posted above, so that's a considerable investment.

cool thanks.. and I will be getting more tools :) Really it's just a matter of time. I like to do other small projects around the house and having more tools would be great. With this whole thread.. since there doesn't seem to be a real easy way to make these, I may try to find another Amish builder who can knock these out for me.. and then build up my tools.. maybe start with a good miter saw and then try and practice making my own .
 
I like it! The little Ogee adds a nice detail. The price isn't that bad either.
If you did want to make 1/2 laps? I recommend a jig like this that will make it very easy to control the depth and accuracy
 
Hi again :)
So I'm such a dope... LOL!!! I found out my Router is 1.5 HP... 1/4 collet, 25,000 RPM .. ya someone sent me an actual manual.. Sorry about that. Does that change anything?
You mentioned your router has a 1/4" collet. The bits selected/depicted are 1/2" shank. You probably want that bit set but with 1/4" shank.
Yes, that's correct! Thanks for pointing that out.
The other bits posted were 1/2" shank as well, in post #2:
We need to get this sorted out before going any further.
We need the model number of the Ryobi router and determine if there is a 1/2" collet for it.
No, there is not and the RPMs are 25,000 for 1/4" bits. Too fast for the 1/2" larger bits.
From the manual:
It only accepts 1/4" shank bits!

The older Craftsman routers would only accept 1/4" shank bits. I had one and gave it away.
Palm routers, especially battery powered like my Milwaukee, only accept 1/4" shank bits.
The issue with 1/4" shank bits is the amount of material that can be removed per pass.
A 1/2" shank bit is more robust and will not bend when lateral force is applied.

I'm sure there are rail and stile bits with a 1/4" shank, but in my opinion, it's time for a bigger router.
The OP posted this in post #10:
If it helps.. my router is a ryobi R163.. and here are some pictures on my benchtop router table it's in and some of the actual frames.
Maybe I do need to get a new router? I don't mind and maybe I can get a used one to use am I am learning.
Should I get like a 2.5HP? Maybe I can get a table for it too... ?


There are some great mid size routers, Bosch and Dewalt among them:

This You Tube video explains how there's an issue with removing the motor from the base:
 
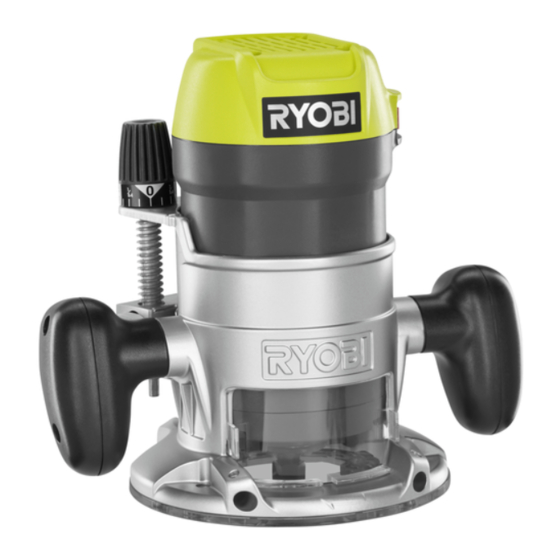
I’m brand new to woodworking.. I have a hand me down Ryobi 1/2 hp router and bench top table for it and even an older chopsaw.
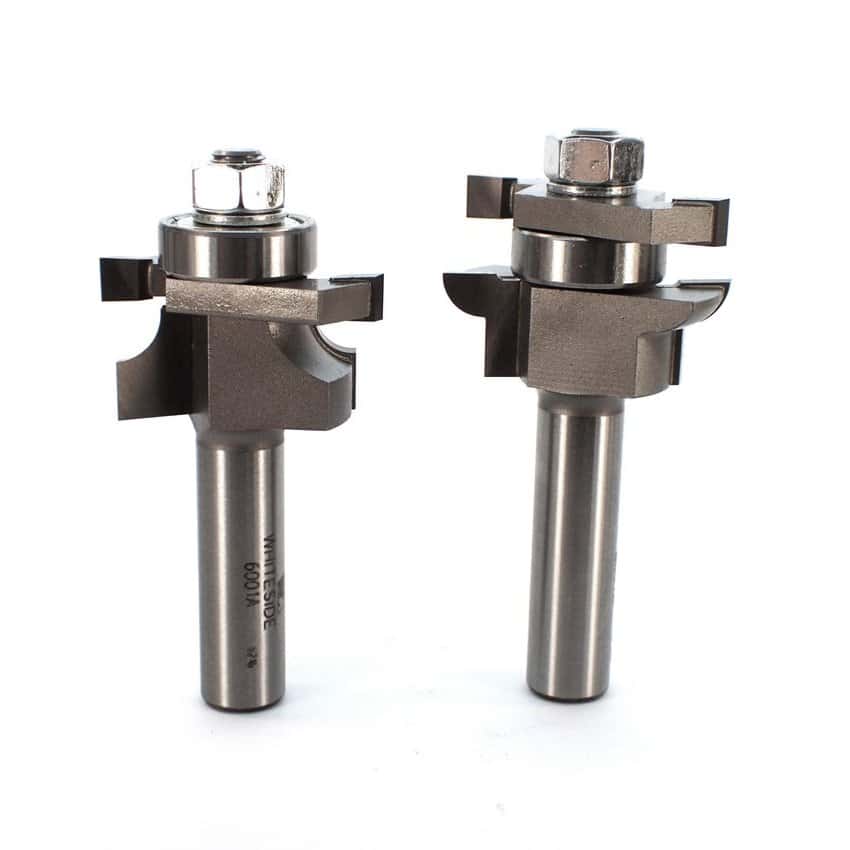
im trying to find some specifi Router bits that can makes these kind of cuts.. I’m pretty sure they are for rail and styles, but I have no a clue which ones they are.

I’ll be using it wood to create some simple picture frames. I know I can get a new chop saw and cut 45s and any other of a number of ways. But I want to just start making my own this way.
im actually a portrait painter and use these to frame my work. I was getting unfinished oak frames from an Amish guy and finishing and staining them myself to compliment the art.. but he‘s dissapeared
. i was able to tear one of his frames a part and this is what I found. I figured I could make these myself. I have the basic tools.. just need to figure out which router bits to get.. I’d be really grateful if anyone knows and could tell me !
View attachment 475919
View attachment 475920

View attachment 475917
View attachment 475918
Yes, definitely made with a rail and stile bit, or bit set, intended for making cabinet doors. That's a pretty simple one; you can find them with ogee or other compound curves. They come in two types. The one Steve showed has two separate bits, one for the concave and one for the convex profile. The biggest hassle involved with these sets is getting the height set properly. Tip: put a tight-fitting cheap neoprene O-ring on the shanks of both. When you have the height set correctly, slide the O-ring down against the router collet as a guide for the next time you swap bits. I have, somewhere, a single-bit set that also requires taking the bit apart to re-stack the cutters when changing from one profile to another, adding another hassle to the process. I don't use that one much.
You might want to read and consider something long-time member Jim Frye recently posted about picture framing. Jim has a background in industrial design and mentioned that a butt joint, where the end of one board is placed against the edge of another, common design for cabinet doors, tends to stop the eye rather than drawing it into the actual art work inside the frame. It's a valid concern, although less so in a frame that's painted and doesn't have any real wood grain to flow.
Something else to consider, if you haven't done much of it, is that making a truly square or rectangular frame with mitered joints isn't quite as easy as it looks. Particularly when working with wide frames, less than a degree of error can leave embarrassing gaps. The same is also true for 90-degree cuts. You might want to begin by making some trial cuts, and read the manual for your miter saw carefully, particularly the parts about making sure your fence is at a true 90-degree angle to the blade, and how to adjust that if it's not. That's also true of the various angle stops it may have. Close enough for framing a house isn't close enough for framing a picture.
 
21 - 35 of 35 Posts