

I have recently begun the long, painfully enjoyable road of becoming a drum builder. Having no prior woodworking experience, it was a daunting task, but I have been rather successful/lucky in making some nice drums from the get go. Snare drums are my main focus for now, but I hope one day to expand and do full kits. Here is a step by step process I used for building. Thought some of you may be interested.
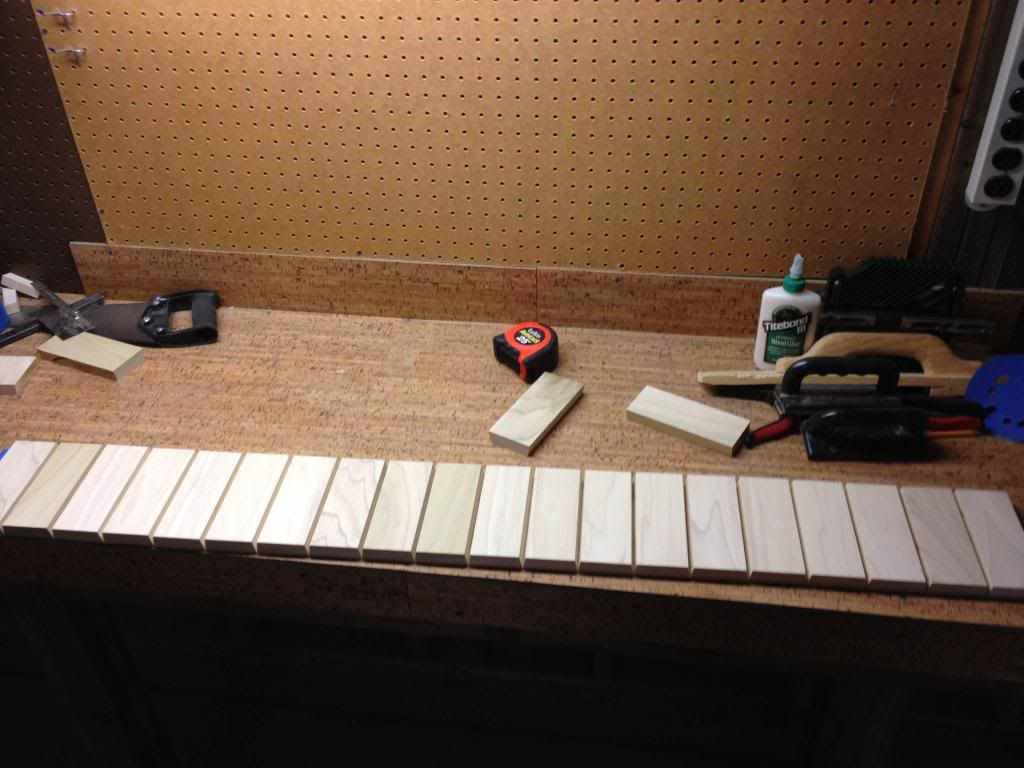
Start by cutting staves down to size, and at the correct angle for the size of drum you want. My buddy made this handy stave calculator to take all the guess work out of it. http://unionbridgedrums.com/pages/stave-calculator
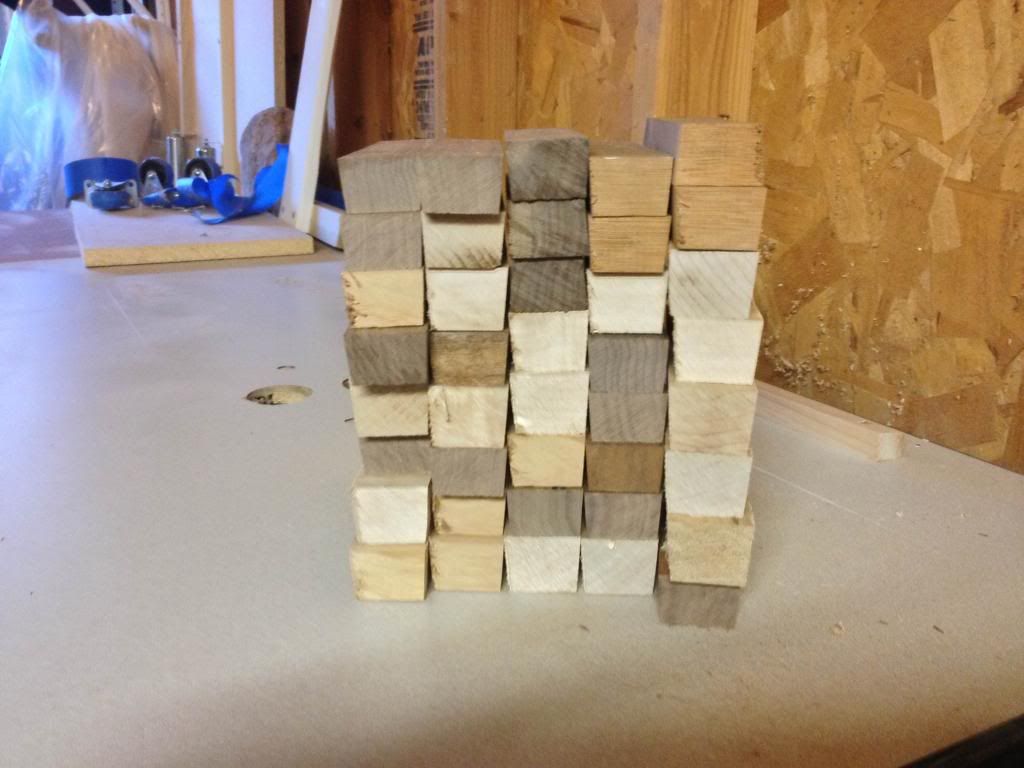
These are 40 staves made of quarter sawn walnut and quilted maple.
You need to line them up, with the larger side facing up, to see how the joints will fit together. I then take blue painters tape and run a strip or two over the length of the staves, and flip them over so all the joints are facing up.
Sorry, pics from different drums I have made.
You can then glue all the joints (using titebond 2 or 3), and put band clamps on the drum to hold it in shape while it dries overnight. You only have a minute or so to finalize the alignment once the glue has been applied.
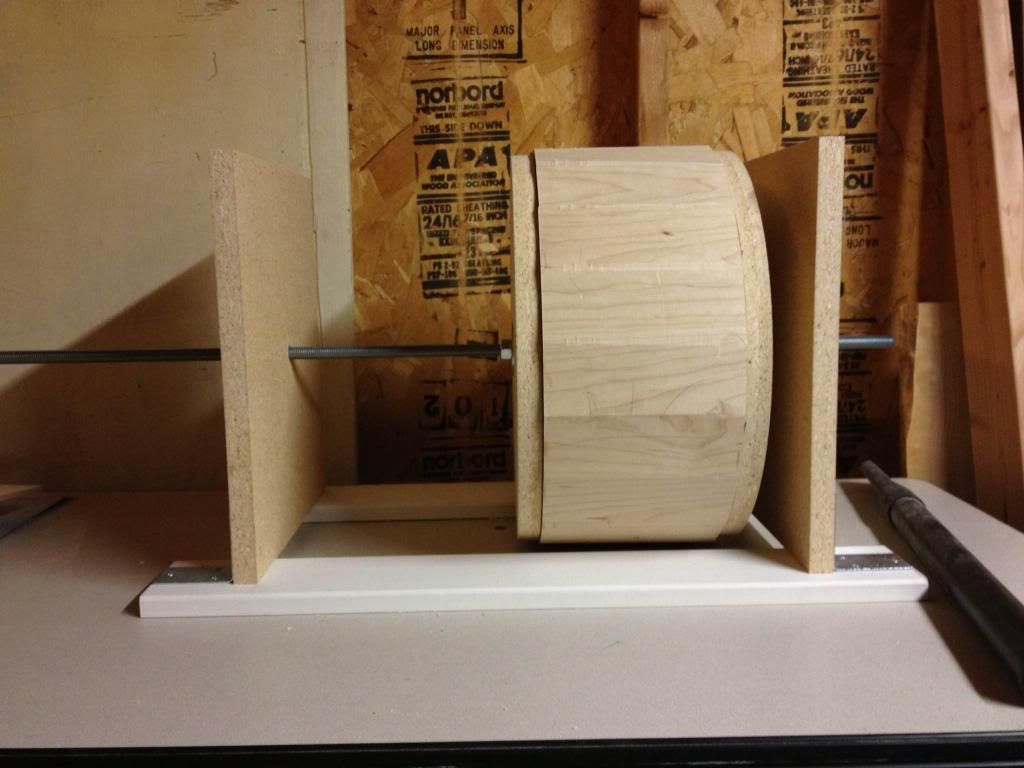
This is a picture of the 40 stave drum during the dry test fit ( a crucial step I forgot to mention above). This is what it looks like for gluing also.

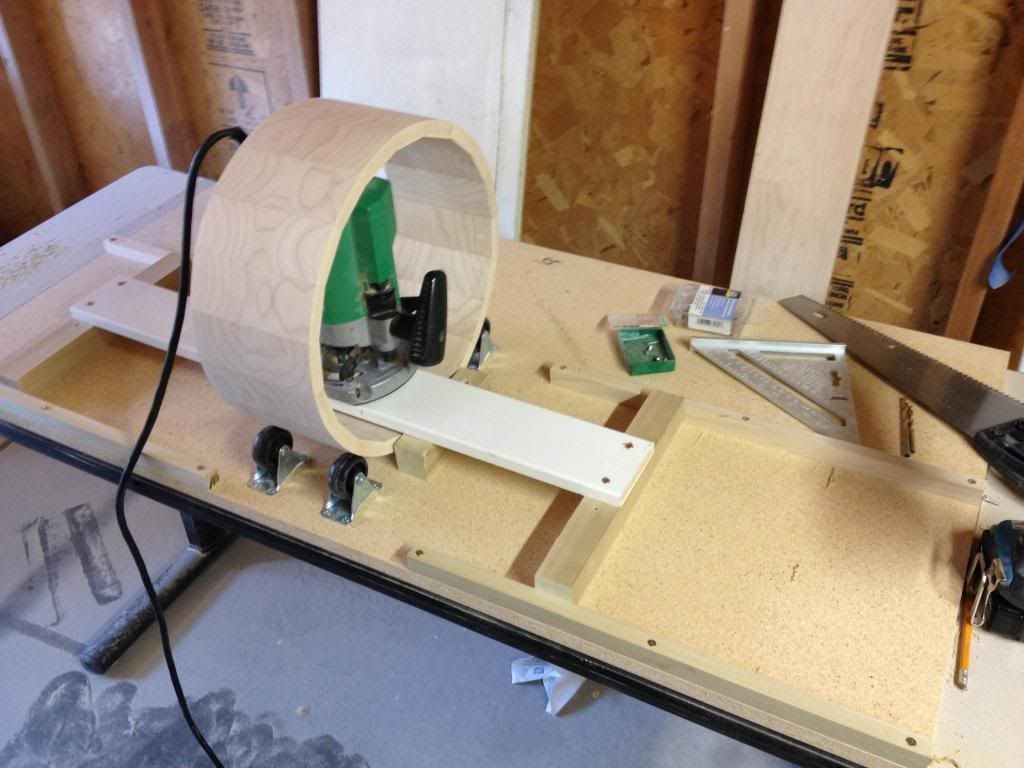
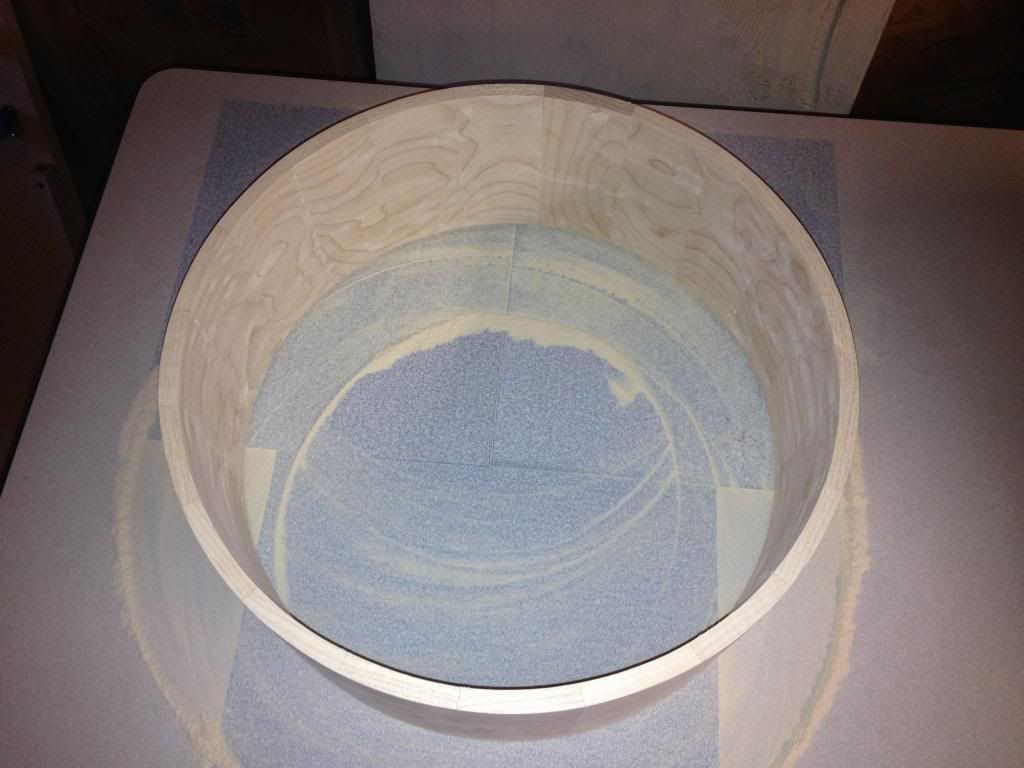
Once the glue is dried, take the tape and clamps off, and throw it in your router jig (seen below). I have 2 14" discs of MDF on a threaded rod hovering over my router table. Turn the drum a small amount at a time until the drum is 1/8" bigger than your final diameter. This will allow for final sanding.
Here is my inside jig. Fairly self explanatory, but very effective.
Once you have the drum rounded, it is time to get the edges flat in preparation for bearing edges.
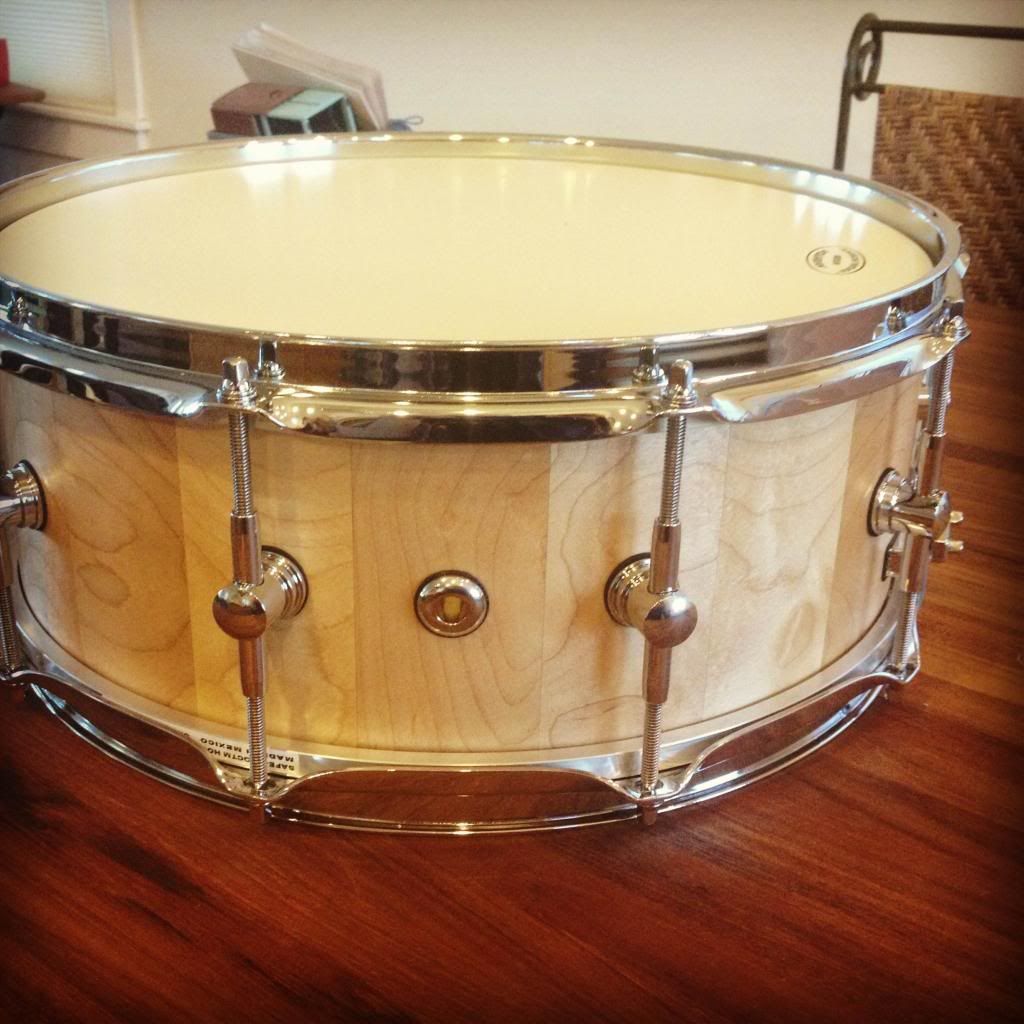
After that, cut bearing edges to your preferred angles with the router table, and it is time for finish! I am not experienced with finishes so I have been using tung oil and wax, which protects and gives it a nice satin finish. Here are a few drums I have made. Let me know if you have any questions.

14"x4.5" walnut shell
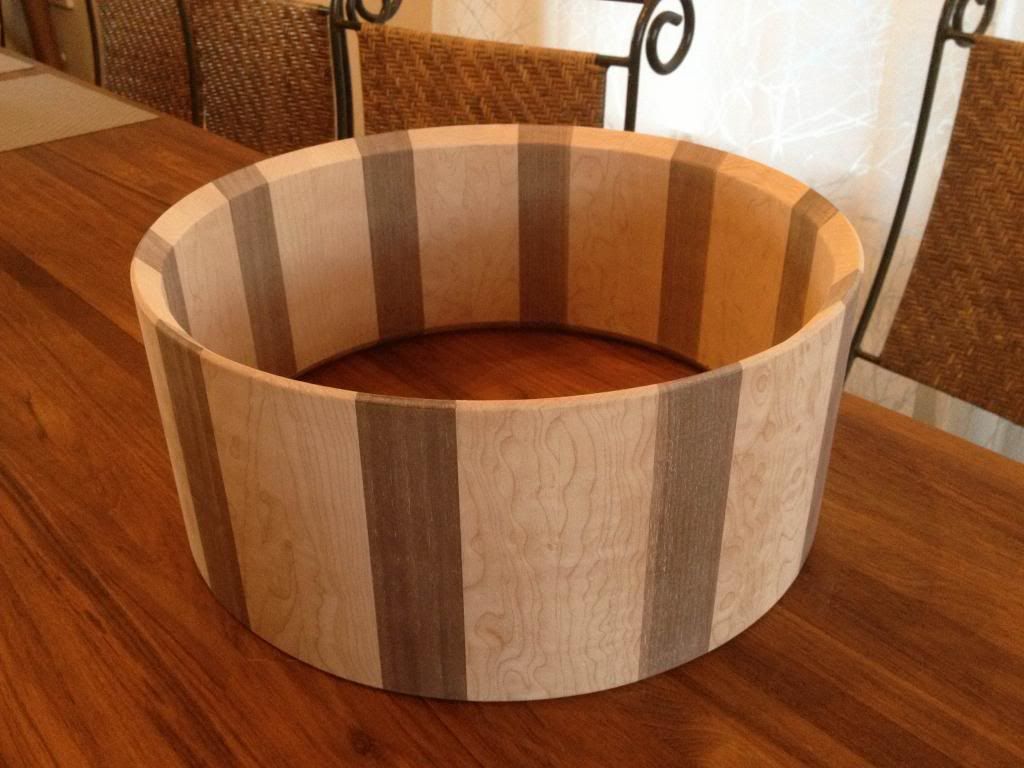
14"x6" maple with walnut stripes
14"x5.5" maple. This is the first one I built, and I rounded it and filed bearing edges by hand. Didn't have my router table set up yet and was impatient. Many hours invested in this one, but well worth it.
Start by cutting staves down to size, and at the correct angle for the size of drum you want. My buddy made this handy stave calculator to take all the guess work out of it. http://unionbridgedrums.com/pages/stave-calculator

These are 40 staves made of quarter sawn walnut and quilted maple.
You need to line them up, with the larger side facing up, to see how the joints will fit together. I then take blue painters tape and run a strip or two over the length of the staves, and flip them over so all the joints are facing up.

Sorry, pics from different drums I have made.
You can then glue all the joints (using titebond 2 or 3), and put band clamps on the drum to hold it in shape while it dries overnight. You only have a minute or so to finalize the alignment once the glue has been applied.
This is a picture of the 40 stave drum during the dry test fit ( a crucial step I forgot to mention above). This is what it looks like for gluing also.

Once the glue is dried, take the tape and clamps off, and throw it in your router jig (seen below). I have 2 14" discs of MDF on a threaded rod hovering over my router table. Turn the drum a small amount at a time until the drum is 1/8" bigger than your final diameter. This will allow for final sanding.

Here is my inside jig. Fairly self explanatory, but very effective.

Once you have the drum rounded, it is time to get the edges flat in preparation for bearing edges.

After that, cut bearing edges to your preferred angles with the router table, and it is time for finish! I am not experienced with finishes so I have been using tung oil and wax, which protects and gives it a nice satin finish. Here are a few drums I have made. Let me know if you have any questions.

14"x4.5" walnut shell

14"x6" maple with walnut stripes

14"x5.5" maple. This is the first one I built, and I rounded it and filed bearing edges by hand. Didn't have my router table set up yet and was impatient. Many hours invested in this one, but well worth it.


